How to create a screencast in Xubuntu using ffmpeg
In this article, I’m going to describe how to create a desktop screencast recording with or without audio in Xubuntu 16.04. With little changes, however, it should work on other distros too.
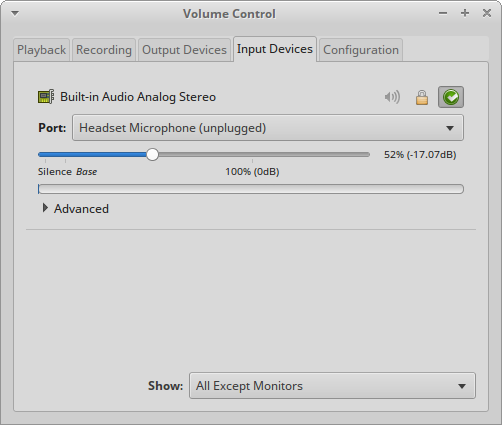
The first thing to do is to ensure that your headphone microphone is enabled in Xubuntu audio settings. For some reasons, Xubuntu doesn’t seem to do this by default. Just click that tray icon top-right corner and click on Sound Settings. Then click on Input Devices tab and select Headset Microphone or something from the list, and unmute the device by clicking the grey color audio icon:
And of course, you’ll need ffmpeg to do this, its a small command line audio utility in linux. Its only a sudo apt-get away in case you don’t have it already. After that, all you have to do is run this command:
ffmpeg -video_size 1024x767 -framerate 25 -f x11grab -i :0.0+0,0 -f alsa -ac 2 -i default output.mkv
To stop the screen recording, just press Ctrl+C. This command uses the alsa module to record audio. The -ac 2 parameter specifies the audio channel (stereo as opposed to mono). If you want, you can also specify an audio sampling rate using -ar option which is usually 44100 by default. The -i default refers to the default available audio device. It usually works, but in case it doesn’t, you can specify the exact input device you want to use. In order to do that, run this command:
arecord -L
And you will get an output such as this one:
dmix:CARD=PCH,DEV=0
	HDA Intel PCH, ALC3234 Analog
	Direct sample mixing device
dsnoop:CARD=PCH,DEV=0
	HDA Intel PCH, ALC3234 Analog
	Direct sample snooping device
hw:CARD=PCH,DEV=0
	HDA Intel PCH, ALC3234 Analog
	Direct hardware device without any conversions
plughw:CARD=PCH,DEV=0
	HDA Intel PCH, ALC3234 Analog
	Hardware device with all software conversions
In the above, you can see the plugged-in available sound card at the end. So you can take that device and specify it in this way instead of the default device:
ffmpeg -video_size 1024x767 -framerate 25 -f x11grab -i :0.0+0,0 -f alsa -ac 2 -i plughw:CARD=PCH,DEV=0 output.mkv
If you don’t want audio in the screencast, however, then omit the alsa module and just run this instead:
ffmpeg -video_size 1024x767 -framerate 25 -f x11grab -i :0.0+0,0 output.mkv
I’ve used other screencasting software in Linux before such as the RecordMyDesktop tool and the built-in Ctrl+Shift+Alt+R screencasting in GNOME. But this method of using ffmpeg was what I found to be the most speedy and configurable. Try it and do let me know how your screencasting goes!