How to Unbrick and revive a totally lifeless Xiaomi Mi-Pad
Last week, my brand new Xiaomi Mi-Pad arrived via Flipkart and no sooner did I have it in my hands, I started installing useful apps like Greenify, ES File Explorer, etc. Two days went by and I was disappointed to learn that it doesn’t support a USB Dongle (Data Card) which is a very common method of Internet access in India. The only way I could have it was to root the tablet. And it was while rooting using SuperSU app that I foolishly selected a wrong click and ended up bricking my brand new tablet.
The Problem
It was a hard brick, meaning my tablet showed no signs of life when switched on or connected to a PC through a USB cable. Had it been a soft brick, meaning that I were able to boot to MIUI Recovery by pressing Power+UpVolume or to FastBoot Recovery by pressing Power+DnVolume button, it would have been easy to recover. But my tablet was totally dead. Even after charging for next 6 hours, all it did was light up a black LED screen for a second or two and then vanished for any combination of those buttons.
The problem was that the wrong click that I made had caused the tablet bootloader to be corrupted. And in the android world, if the bootloader is lost, then your device is literally as useful as a brick! Unlike 8086 PCs, android tablets don’t have a hard-wired BIOS to recover things from, the bootloader is as good as the BIOS.
The Research
Now obviously, I was disappointed and annoyed. After spending ₹10,999 on a brand new tablet, this was not what I was hoping for. Getting service from a Xiaomi service center was not an option as they are very rare in India. Besides, OEMs hardly provide warranty/support to people who try and root their devices, do they? So naturally, I had to myself find a way out of this. My research finally led me to a post by a Russian hacker who had successfully revived the tablet from this very situation. In this article, I’ll note down exactly what steps I had taken to revive it and hope that someone might find it useful.
The Solution
Though the solution is easy and straight-forward, there are some tricky areas where you might run into trouble. If you don’t have the confidence to open up an electronic device using a screwdriver or flash a stock ROM, just say quits and if possible, ask help from someone you know who is used to do it. Basically, the process involves this:
- Open the back-cover by separating it from the screen (fingernails or a sharp object will do) and unscrew the plastic panel that covers the top area of the motherboard.
- Disconnect the battery by slowly pulling the power belt (using a flat-head screwdriver or any sharp object).
- Connect the USB cable to Mi-Pad end (but not the PC end).
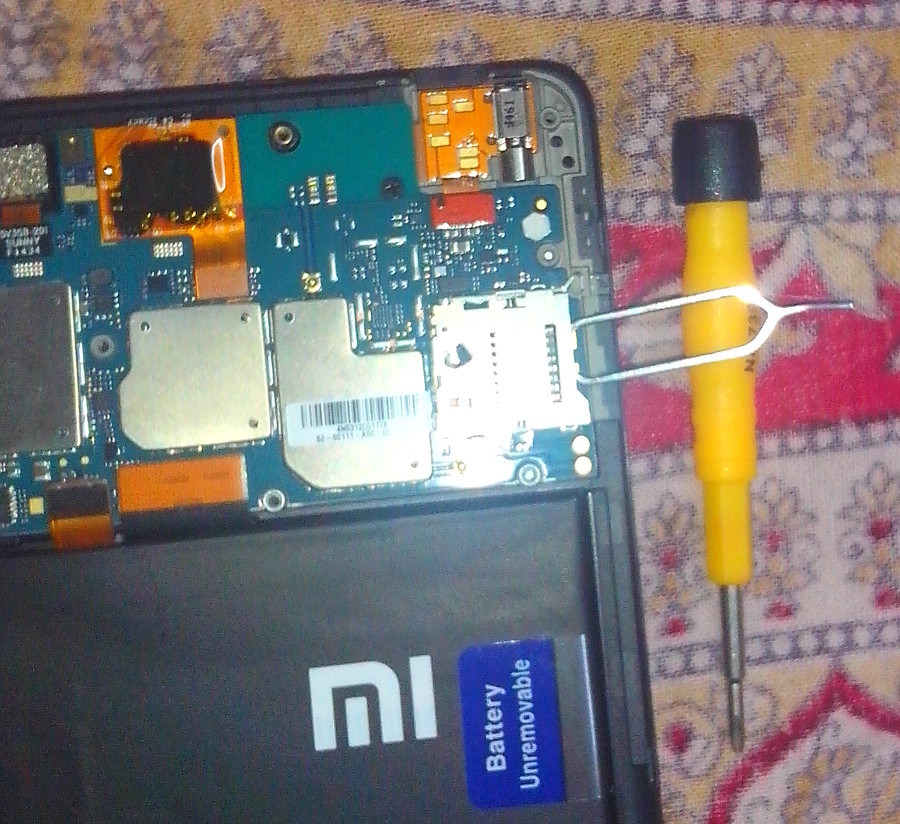
- Create a short circuit between the two tiny pads inside the MicroSD card slot using a metal object or wire.
- Connect the USB cable to the PC end.
If done properly, the PC will detect a Nvidia Boot Recovery for Mobile USB device and then you can flash your stock ROM using Xiaomi’s flashing software, Mi Flash Tool, thus putting the life back into your tablet.
The Magic
The most tricky and magical aspect of this whole process is the short-circuiting in step four. Firstly, it is not easily diagnosable. The Nvidia USB driver is in fact detected by the PC even if you don’t create the short-circuit (but the battery needs to be disconnected of course), but then it will disappear instantly and you won’t get the time to flash your stock ROM. For some unknown laws of electricity (or maybe the laws coded inside this Nvidia driver), the short-circuit may not work instantly the first time. You’ll create the short-circuit, connect to the USB port and hear the Windows beep sound for USB connection, but moments later you will hear another beep of disconnection. If that happens, you’ll have to disconnect the USB cable and repeat from step-4: Create the short-circuit again and reconnect to the USB port - I had to do this about 50 times before the connection was stable enough for me to flash the ROM.
Some forum posts advice you to plug in the power belt at exactly the same time as the USB connection is detected in the PC. However, I’ve found that its not true. Not once did I put the power belt back in the whole process until the ROM had been flashed completely.
The Weapon
You can use any metallic object to create the short circuit, even a tiny wire could be used. The important thing is that those two minuscule pads inside the MicroSD slot are connected by a metal. Personally, I used this tiny pin that came with the booklet along with the Mi-Pad itself!
 {.size-large}
All I did was place that pin inside the MicroSD slot, so it created a bridge on top of those two pads, and supported the pin using any available object (in this case a screwdriver).
You’ll also need a 2.0mm screwdriver to open the back-panel above the motherboard. Please remember that opening those screws are going to void your warranty (which is going to happen in any case since you either tried to root or used the dd command to rewrite partitions in order to reach this stage!).
On your Windows PC, you need the following installed:
- Latest version of Mi Flash Tool (Can be downloaded here).
- Latest version of Mi Phone Manager PC Suite for the Nvidia drivers (Can be downloaded here).
Alternatively, you can download the whole bundled software from here that comes with Mi Flash Tool, NVidia Drivers and ADB Drivers too.
You’ll also need to download the latest MIUI stock ROM for Mi-Pad from here and extract somewhere on your PC to flash it later.
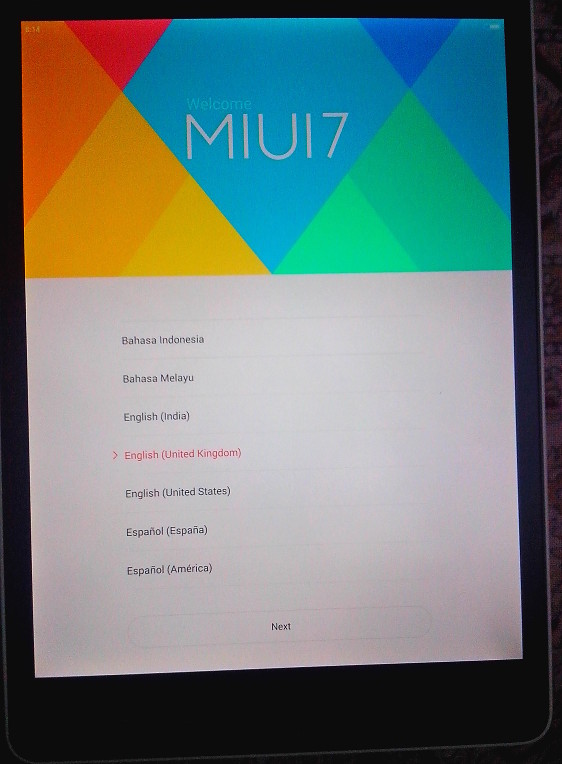
Once your short-circuit works and the connection stays stable, waste no more time. Just fire up the Mi Flash tool and select the path to the ROM image you just extracted and click the flash button. Once the flash is successful, assemble back your Mi-Pad and on pressing the power button, you should see this:

Summary
Keep a cool mind and do it, it can be done! If you can’t do it, try and find a mobile repair shop nearby or catch a tech enthusiast in your circle who can do it.