How to create a Google Drive App in PHP
This is the second article in the drive series for web programmers that aims to explain how to use the Google Drive API in your web applications to access files/folders on behalf of your logged-in users.
One of the basic tasks here is to authenticate to google and access the drive on the user’s behalf once they grant permission to your app. This method of authentication is called OAuth and is very much needed for implementing the drive api.
However, a good documentation to implement this in a backend app, especially a php app is very much lacking. The so called quickstart for drive api and the web based example here show some example code, but what a lot of beginner programmers need is a step-by-step tutorial of how to go about doing it.
I: Register a google app by visiting the Google API console:
The way the latest version (V3) of drive API works is only through OAuth. It means you cannot put a password or API key inside your code and access the drive files. You need to register your backend app and generate OAuth credentials for the app, so that it can access the drive on the user’s behalf once the user grants permission to the app. So the first step is going to the Google API console, registering the app itself and generating OAuth credentials. The registration process is pretty straightforward, we just select “Create Project” from the dropdown and give a nice name for the project such as Drive Example App in our case.
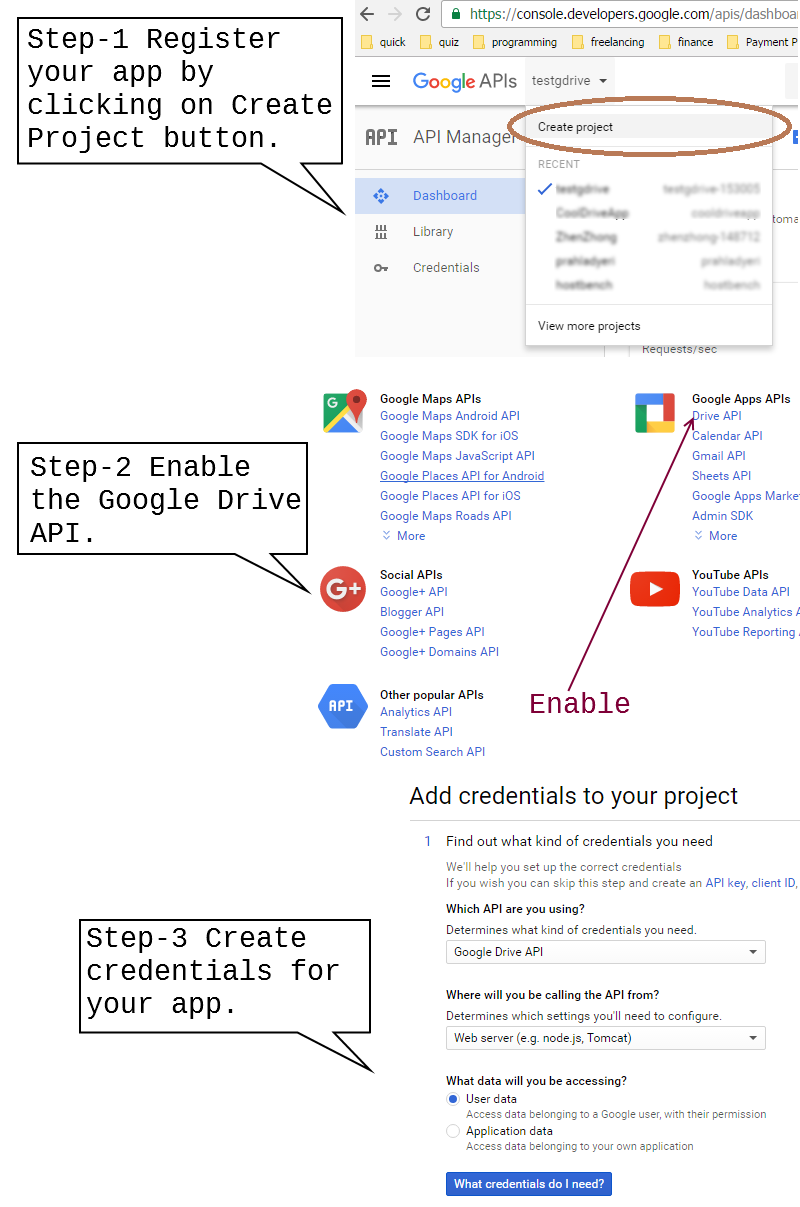
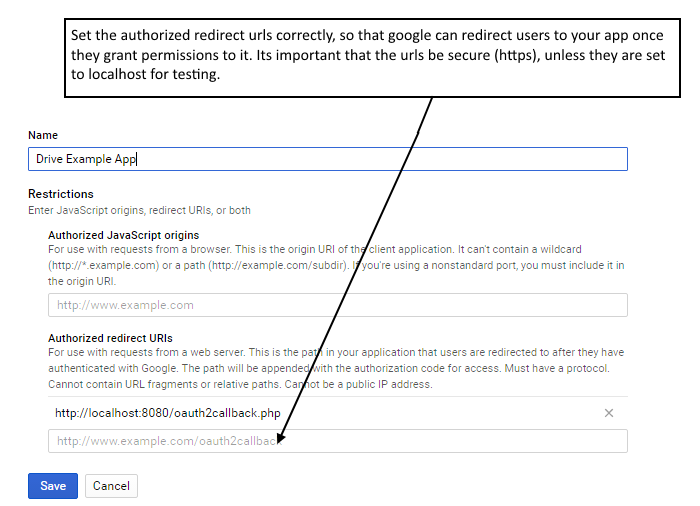
II: Configure the credentials and download the client_id.json file:
This is the credential file that validates to Google who you are (as a developer) and also your app that acts on your behalf. Download and save it as client_id.json in the same directory as your app.
III: Write your back-end app:
First of all, you have to add the dependency of google-api php library to your project. If you are using composer, all you need to do is add this package to the composer.json:
"require": {
  "google/apiclient": "^2.0"
}
If you don’t use composer, you can just download the latest version of library from their repo, and just require_once it in your code like this:
require_once '/path/to/google-api-php-client/vendor/autoload.php';
You can follow this pattern for any kind of php project, be it based on Symfony, Laravel, CodeIgniter or even a pure php project. But this tutorial and code example is based on a pure php project.
The first thing to do now is to handle the home page url (index.php).
$client = new Google_Client();
$client->setAuthConfig('client_id.json');
$client->addScope(Google_Service_Drive::DRIVE);

if (file_exists("credentials.json")) {
	$access_token = (file_get_contents("credentials.json"));
	$client->setAccessToken($access_token);
	//Refresh the token if it's expired.
	if ($client->isAccessTokenExpired()) {
		$client->fetchAccessTokenWithRefreshToken($client->getRefreshToken());
		file_put_contents($credentialsPath, json_encode($client->getAccessToken()));
	}
	$drive_service = new Google_Service_Drive($client);
	$files_list = $drive_service->files->listFiles(array())->getFiles();
	echo json_encode($files_list);
} else {
  $redirect_uri = 'http://' . $_SERVER['HTTP_HOST'] . '/oauth2callback.php';
  header('Location: ' . filter_var($redirect_uri, FILTER_SANITIZE_URL));
} We first check whether we have the drive access credentials for the user locally stored in a file called credentials.json (not to be confused with client\_id.json we downloaded earlier which is for developer credentials). Again, we are assuming a single user scenario here. If your drive app needs to authenticate with multiple users, you’ll have to store separate credentials.json for each logged-in user in the database, and access that through a session or something.
Further, if credentials aren’t found locally, we direct them to /oauth2callback.php, so google will authenticate them and send us the token for accessing the drive, and after that, we will put that token into the local file, credentials.json and redirect the user back to the index.php. Finally, we call the listFiles() method that displays the list of all files and folders in that user’s drive. Here is the code for oauth2callback.php:
$client = new Google_Client();
$client->setAuthConfigFile('client_id.json');
$client->setRedirectUri('http://' . $_SERVER['HTTP_HOST'] . '/oauth2callback.php');
$client->addScope(Google_Service_Drive::DRIVE); //::DRIVE_METADATA_READONLY

if (! isset($_GET['code'])) {
  $auth_url = $client->createAuthUrl();
  header('Location: ' . filter_var($auth_url, FILTER_SANITIZE_URL));
} else {
  $client->authenticate($_GET['code']);
  $access_token = $client->getAccessToken();
  file_put_contents("credentials.json", json_encode($access_token));

  $redirect_uri = 'http://' . $_SERVER['HTTP_HOST'] . '/';
  header('Location: ' . filter_var($redirect_uri, FILTER_SANITIZE_URL));
}
Once you have the credentials locally (in the form of credentials.json), you can just use it to access the drive API. Thus, the result of this whole exercise is that only on first page load is the user redirected to google site to authenticate themselves. Once the app has the access token (credentials.json), its no longer required, the drive can be accessed directly by the app from then on. If all goes well, you should be able to see a screen such as this when you test this example app for the first time:

I’ll leave the more comprehensive use of this API as an exercise to the reader who wants to develop a more fully featured app out of this. Click the below link to download the source for this example implementation from the Github repo:
php_drive_example{.btn .btn-md .btn-success}
Note:
If you are getting an SSL certificate error while testing this on Windows, have a look at this.